Laster...
HOPE VALLEY CLOUD logo HOPE VALLEY CLOUD logo HOPE VALLEY CLOUD logo HOPE VALLEY CLOUD logo
Nyheter:
Welcome to Hope Valley!
Norwegian
  • العربية
  • Azerbaijani
  • Català
  • 中文
  • Hrvatski
  • Čeština
  • Dansk
  • Nederlands
  • English
  • Estonian
  • Persian
  • Français
  • Deutsch
  • עברית
  • Magyar
  • Italiano
  • Macedonian
  • Norwegian
  • Português
  • Português
  • Română
  • Русский
  • Español
  • Svenska
  • Türkçe
  • Українська
  • 0
    Registrer Konto
    ExtendReduce
    Hjem
    Butikk
    Bla gjennom alle ----- Shared Hosting Registrer et nytt domene Overføre domener til oss
    Driftsmeldinger Kunnskapsbase Nettverksstatus Bonusprogram Kontakt oss
    Kunde innlogging
    Kunnskapsbase
    1. Kundeområdet
    2. Kunnskapsbase
    3. FTP
    4. FileZilla Client
    5. How to Install Filezilla Client on Windows
    Kategorier
    • Backup/Restore
      4
    • Cloudflare (cPanel)
      9
    • CloudLinux (cPanel)
      10
    • cPanel - Control Panel
      24
    • Databases
      11
    • DirectAdmin
      48
    • DNS - Nameservers
      6
    • Domain Management
      10
    • Email
      17
    • FTP
      9
    • Installing a Control Panel
      6
    • Mail Filters & SPAM
      8
    • Mobile
      11
    • Others
      3
    • PayPal
      7
    • Plesk
      47
    • Security
      10
    • SiteWorx (Control Panel)
      58
    • Softaculous
      69
    • SolusVM
      18
    • SSL
      5
    • Virtualizor
      19
    • WHM
      18
    • WordPress
      17
    Support
    • Brukerstøtte
    • Driftsmeldinger
    • Kunnskapsbase
    • Nedlastinger
    • Nettverksstatus
    • Ny henvendelse
    How to Install Filezilla Client on Windows
    Skriv ut

    Installing the FileZilla FTP Client on Windows OS is easy. Just follow this tutorial.


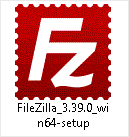
    1. Download the Filezilla FTP Client Installer file for your Windows OS.


    2. Double click to Run the FileZilla FTP Setup File. If it shows a security warning, please read and accept it. Then click on Run.

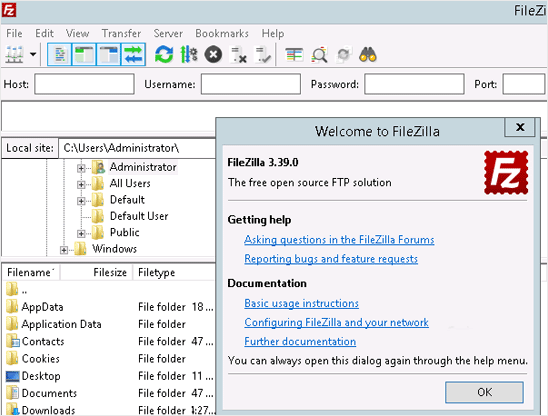
    3. The FileZilla Client will show a License Agreement. Please, read it and accept the agreement to install the FileZilla Client on your computer.


    4. Click on Next until it shows the Install option. Then choose it.

    5. The installation usually completes in a few seconds. However, depending on the speed of your computer, it may take a little longer. Once it ends, confirm with Finish.


    Congratulations. You have successfully installed the FileZilla Client on your Windows operating system. Now you can start using it.
    Var dette svaret til hjelp?

    0 brukere syntes dette svaret var til hjelp (0 Stemmer)

    Relaterte artikler

    Mest populære

    How to Access or Connect to the FTP via FileZilla

    You can access your FTP Account using the FileZilla FTP Client or any FTP Client. 1. Open the...

    How to Create or Delete a Directory Using FileZilla

    You can create or remove a directory on your website using the FileZilla FTP Client.1. Open the...

    How to Upload the Index File to Your Website via FileZilla

    You can follow this tutorial to upload the files to your hosting account. 1. Open FileZilla FTP...

    How to Download Files and Directories to Your Computer via FileZilla

    You can download files from your website to your computer using the FileZilla Client.1. Open...

    Kopirett © 2025 HOPE VALLEY CLOUD. Alle rettigheter er reservert.
    Laster...
    Laster...
    Velg språk
    العربية
    Azerbaijani
    Català
    中文
    Hrvatski
    Čeština
    Dansk
    Nederlands
    English
    Estonian
    Persian
    Français
    Deutsch
    עברית
    Magyar
    Italiano
    Macedonian
    Norwegian
    Português
    Português
    Română
    Русский
    Español
    Svenska
    Türkçe
    Українська

    Velg valuta

    $ USD
    € EUR

    Generer passord

    Vennligst skriv inn et tall mellom 8 og 64 tegn for passordlengden